There are various application examples for following the observation session via a website
For me personally it is important to monitor the session from mobile devices.
The display of the session via projector in a lecture room could be useful, etc.
In astronomical fields of application there is usually no need for video streaming via special programs that are not always trustworthy,
but simple screenshots at regular time intervals usually fully meet the requirements.
The following procedure is recommended:
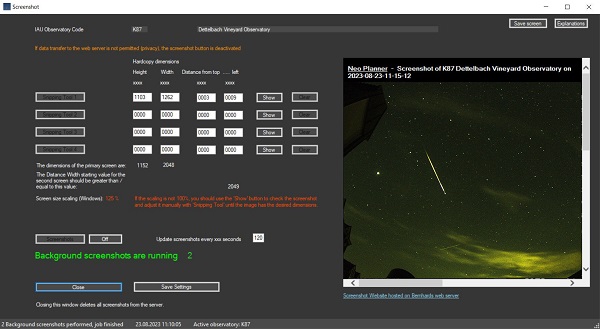
First, the dimensions of the height and width of the primary screen are determined and displayed for your information. In the example above: height 1440 and width 2560.
Within this frame, expanded in width by a possible second screen, up to four hard copies can now be defined with the help of a self-made snipping tool.
After running the Snipping Tools, the input fields of up to four screen areas for height, width and distance from the top and left are automatically filled.
For screenshots that are not required, set the fields to the default value 0000 with the clear buttons.
You can also enter or correct the values manually.
By specifying the height and width distances, you get screenshots inside the screen.
To check the current screenshots, press the appropriate Show button.
The desired section is displayed either in the Windows image display or with PAINT.
Screenshots from a second screen have a dimension width greater than or equal to the suggested value.
In addition, you enter the frequency of the screenshot from 010 to 999 seconds and save the entries using the Save settings button.
As soon as the screenshots corresponds to the desired areas, you can press the Screenshots button.
Screenshots are now created in the background and uploaded to the website, the link is shown in the text under the image on the right.
If the scaling is not 100%, you should use the 'Show' button to check the screenshot
and adjust it manually with 'Snipping Tool' until the image has the desired dimensions.
Pressing the OFF key ends the background job and deletes the screenshots from the web server.
The screenshots are also deleted by exiting the Screenshot Window with Close or X.
When NEO Planner is closed, the screenshot website is also deleted.
go to top